 |
 |
| Thank you Sydney, Canberra & Bendigo! |
| It's been a perfect winter start to an Aussie 2023 and I thank every one of you for saying "Hi", loving my new designs & keeping your passion for fabulous knitting techniques alive! It seems like another life when I was now preparing for shows & classes in America and the UK. Keeping in touch on social media is the best I can do at the moment, so I'm crossing my needles that if I cant get to you, please always let me know if you're visiting Australia as I'd love to meet you & show you around my world. Speaking of the studio.... |
Studio Open Days: 10% off Kits
& Yarn, plus Sale items... |
| in the studio, at shows & online |
|
 It's the perfect time for a Studio Open Day in Killarney Heights, Sydney. I have popped a few images of some of the SALE goodies at the bottom of this newsletter so if you can't get to Sydney, you can still get the benefits if you look, love and order online! It's the perfect time for a Studio Open Day in Killarney Heights, Sydney. I have popped a few images of some of the SALE goodies at the bottom of this newsletter so if you can't get to Sydney, you can still get the benefits if you look, love and order online!
The SALE includes:
- Discontinued yarns and garments.
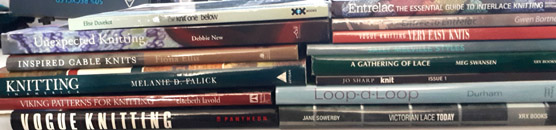
- Knitting and textile Books from Rowan, Knitters & Vogue
- Japanese magazines with crochet patterns.
The 10% discount includes:
All kits and yarns!
Friday/Saturday Sep 1 & 2 from 10am to 2pm at Signatur Handknits Studio: 99 Ballyshannon Rd, Killarney Heights.
Email: jane@sigknit.com for more details
|
| Studio Open Day |
| 10% off kits & yarn plus SALE items |
| Online and in the studio on Friday the 1st & Saturday 2nd of September from 10am to 2pm: 99 Ballyshannon Rd, Killarney Heights, Sydney 2087. Email Jane if you have any questions on jane@sigknit.com or give me a call on 0427 064 834 |
 |
| If you're at a show please ask for the 10% discount as it's only for database and existing customers. If you order a garment at a show or online orders I am offering 30% deposit with garments ready for March 2024 |
| Calendar of upcoming events |
 Studio Open Day SALE Studio Open Day SALE
Fri 1st & Sat 2nd Sept 10am to 2pm
99 Ballyshannon Rd, Killarney Heights
jane@sigknit.com 0427064 834
Fibrefest 2023 at Wyong - all things fibre!
Sunday 10th Sept 10am to 4pm
The Race Club & Function Centre, Wyong
Howarth St - 5 mins walk from Wyong train station.
NSW Quilt Show Rosehill Racecourse
Fri 15 to Sun 17 Sept 10am to 4pm
Deloraine Craft Fair - Deloraine Tasmania
Fri 3rd to Mon 6th Nov 9am - 4pm (3pm Mon)
|
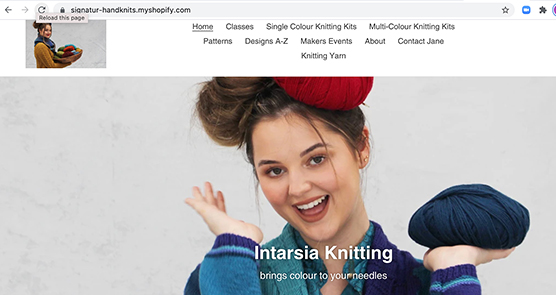
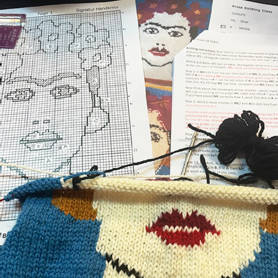
| Intarsia knitting class |
There is always something new to learn with all hand crafts, my offer of the free Intarsia knitting class last month was taken up by many of you and it's still available if you simply email jane@sigknit.com so I can reply with the downloadable document.
If you really enjoyed knitting the first class there is a second class available too. |
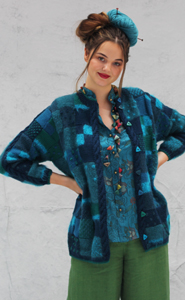
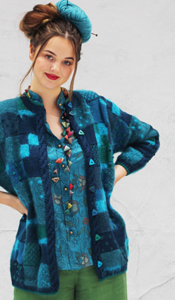
.jpg) 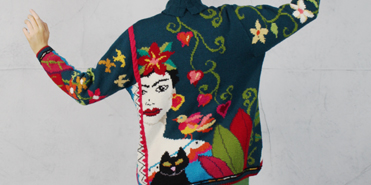 |
 My Frida Jacket design is a big project to knit. To me it's like a good book you can't put down, keeping me fully entertained for weeks. Some customers have knitted this for friends as well as themselves as it's such a creative treat for the addicted Intarsia knitter! My Frida Jacket design is a big project to knit. To me it's like a good book you can't put down, keeping me fully entertained for weeks. Some customers have knitted this for friends as well as themselves as it's such a creative treat for the addicted Intarsia knitter!
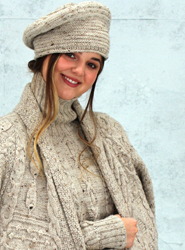
Hats and accessories make really wonderful gifts. My Wicked Hat in Mustard Fleck above and Muffin Top Hat left in Stone Fleck have been super popular as knitters and givers.
This winter I introduced Verve 12ply, perfect for adding a little colour to your accessories. You can buy Verve by the ball, or buy a knitting kit with the yarn and pattern. |
  |
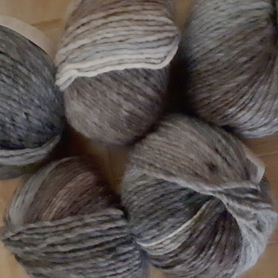 Verve 12ply 70% Wool / 30% acrylic. Verve 12ply 70% Wool / 30% acrylic.
Verve is perfect for my full range of hats and Accessories and replaces Azteca.
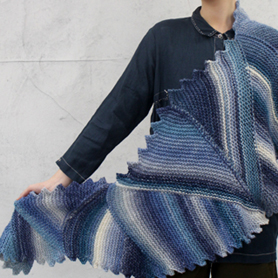
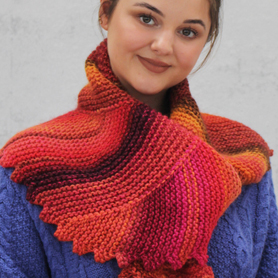
The Wave Wrap design top left really showcases Verve yarn perfectly.
Above shows how each ball looks very different, this is due to the long colour stranding. This can be a little disconcerting at times, so if purple is on the outside of the ball pink is on the inside, making this a treat to discover and uncover as you knit.
Accessory Kits
Knitting yarn |
  |
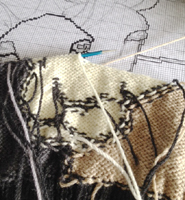
Take a closer look at Intarsia:
worked from a diagram |
 I can always tell when a knitter looks at one of my designs at a show. They will quickly look at the wrongside of the knitting. I can always tell when a knitter looks at one of my designs at a show. They will quickly look at the wrongside of the knitting.
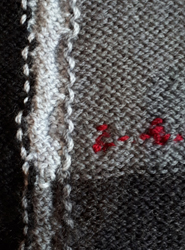
The Bee Bee Jacket has cables between stocking stitch panels of colour. On the close-up (right) you can see how the colours link together, creating a half moon at each colour change. This is knitted from a diagram so, no graph required.
I talk about the colours being linked, but the more common term is twisting, but this suggests more work than they actually take. Get my Simple Intarsia class by emailing jane@sigknit.com
The bobbles are worked from a length of colour, to avoid long strands of yarn between the bobbles. The yarn is trapped into the back of stitches between use. This is called weaving or stranding. Note, long strands can catch on jewelery. |
   |
Now, let's look at Intarsia
that requires a graph |
 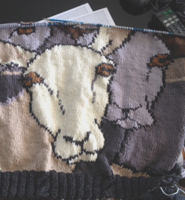  |
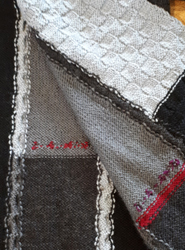
Above: Knitting in progress showing the WS wrongside of the knitting with each area of colour has a ball/bobbin of yarn. The cream is carried behind the grey on the nose of the sheep. The other tricky element is how not to tangle yarn bobbins, which comes with practise. Some of you will be ducks to water: others might throw the knitting in the water!
I mark the graph in pencil as I work across each row, always checking where I need each colour for the next row, this keeps you on your toes! I still have to complete this design! |
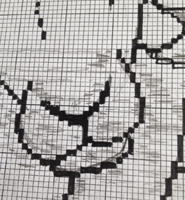
 Left is a class I prepared, a very simple version of Frida. This shows how the RS right side of the knitting is worked from the graph. The graphs show the RS of the knitting and is always the knit side, wrongside rows are purl and the trickiest part of Intarsia knitting. Learning to manage yarns/bobbins takes time too. Email Left is a class I prepared, a very simple version of Frida. This shows how the RS right side of the knitting is worked from the graph. The graphs show the RS of the knitting and is always the knit side, wrongside rows are purl and the trickiest part of Intarsia knitting. Learning to manage yarns/bobbins takes time too. Email
jane@sigknit.com for the 2nd class
A geometric design is easier than a picture, still working from a graph, but the colour changes in these move 1 stitch more/less per colour and no previous row preparation is required for this design. |
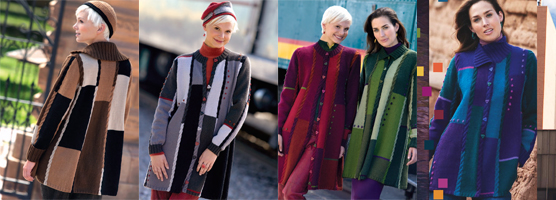
| Times Cable Swingcoat and Santa Fe Jacket |
| These patterns use triangles, which are graphed but simply increase 1 stitch in contrast colour every row, with the smaller triangles 5sts at the widest point, large triangles are 12sts, then reduced back. |
.jpg) 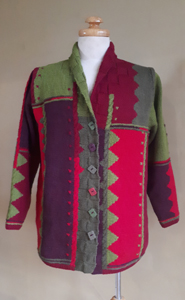 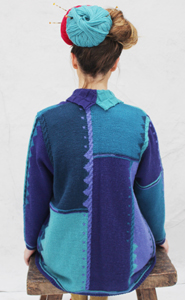 |
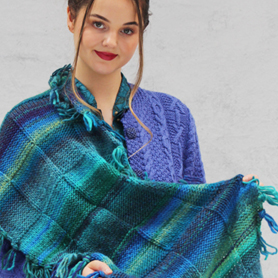
Creating Stitches - I have a knitting class for the Split Texture Jacket. This class includes short rows, moss stitch, cable, knitted-on buttonband, Celtic Cross pattern, garter and Bobble and Hanging Bells stitch patterns. I can email this to you so you can print and work a sample swatch from any yarn you already have handy.
jane@sigknit.com |
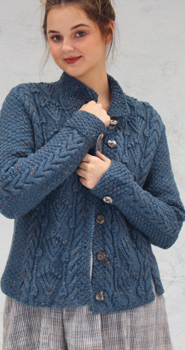 Below Fan,Bell & Cable Cardigan and the Split Texture Jacket, which have to be my most popular designs this season, whether as a ready made or a knitting kit. Below Fan,Bell & Cable Cardigan and the Split Texture Jacket, which have to be my most popular designs this season, whether as a ready made or a knitting kit.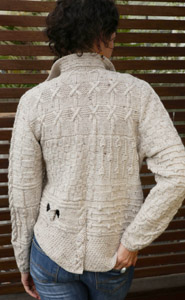 .jpg) |
 |
Sydney Studio SALE - 10am to 2pm
Friday 1st & Sat 2nd Sept
99 Ballyshannon Rd, Killarney Heights
Mobile: 0427 064 834
|
| Swing, Swagger, Drape is now on a USB stick |
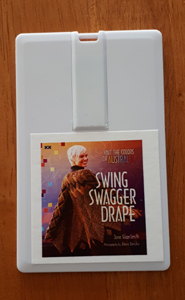 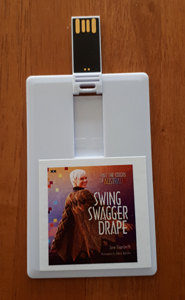 
Out of print as a book, but
now on a USB stick!
Simply slide into your computer, see every page of the book, print out just the pattern you need!
Perfectly packaged A$35 |
| Short row shaping - a classic favourite |
| Hemline slants created with short row shaping |
Below: Split Texture Jacket has quite a steep centre front edge, short rows are each 3sts, while the centre of the Chaffey Jacket takes in 6sts per short row, creating a far less acute wedge.
YouTube has many videos, and there are very different ways to work short rows for many different reasons. There are two parts to short rows and the images below step you through the process, as worked for the Wave Wrap. |
.jpg) 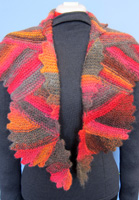 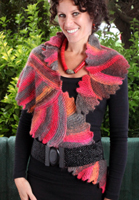 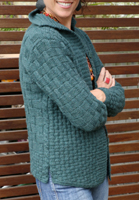 |
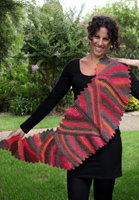 The Wave Wrap, which is a popular knitting kit, when knitted in yarns with long colour changes (not hank dyed) really shows off the short rows and the beautiful yarn. The Wave Wrap, which is a popular knitting kit, when knitted in yarns with long colour changes (not hank dyed) really shows off the short rows and the beautiful yarn.
Left: Wave Cowl, is knitted in 2 halves and has a centre back seam; this yarn highlights the short row technique.
A short row is an incomplete row, turning the knitting without working the full row so the stitches remain but are out of action.
To prevent holes when the knitting is turned a wrap is worked: this sits at the base of a slipped stitch. When the stitch is taken back into action the wrap is worked with the stitch. Voila! No hole. |
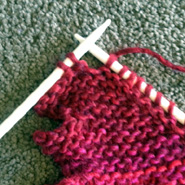 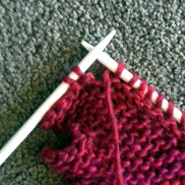  |
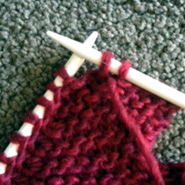
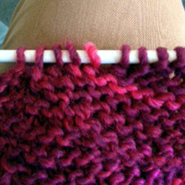
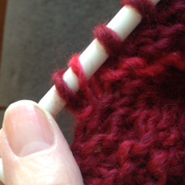
Above left to right: So with 17sts cast on work only 15sts for your first short row.
The piece shown is garter st so knit all rows so the yarn is at the back of the work.
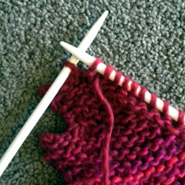
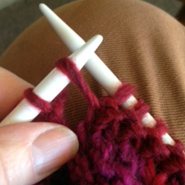
Above centre: Bring the yarn between the needles to the front of the knitting.
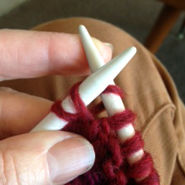
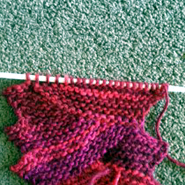
Above right: Slip next stitch left to right needle without working the stitch.
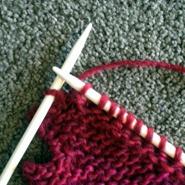
Below left: Take yarn back between needles (single unworked stitch on left needle).
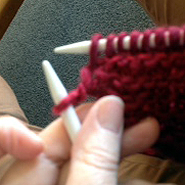
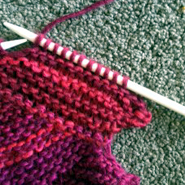
Below centre: Turn knitting - so the single unworked stitch is now on right needle.
Below right: Slip the next stitch left to right needle (same stitch previously slipped).
Take yarn between needles and knit to last stitch. |
 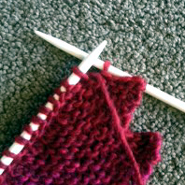  |
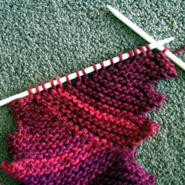
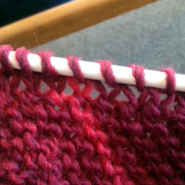
| Zig Zag edge of scarf is created by increasing stitches the end of the wrongside row - a full row. When we cast the increased stitch off we create the points of the zig zag. |
   |
Work wrongside row (full row) until 1 stitch remains unworked.
Above left: Pick up the yarn from between the stitches of the previous row. Can you see how large this loop can be pulled, leaving a hole?
Above centre: Knit through the back of the loop for a firm stitch, no hole.
Above right: Increase stitch completed, knit last stitch of row. |
| Short Row Summary |
Row 1: K15 leaves 2sts unworked - we slipped and wrapped the 16th stitch.
Row 2: Knit to the last stitch, M1 = make 1sts, K1 = 18sts.
Repeat Row 1: K15sts - as we have 18sts this will leave 3sts unworked - wrap and slip the next stitch - so 2sts unworked.
Row 4: As row 2 knit to last stitch M1, K1 = 19sts.
Repeat twice more = 21sts - this means you have worked 4 short rows and 4 increases. |
| Beginning of next short row cast off 4sts (Below left). K11 (instead of 15sts). (below centre). At this point it's really good to look at the stitches over the row. Can you tell which stitches have been wrapped? You'll learn so much simply by looking at the knitting, make fewer mistakes and when you do make a mistake you will find fixing it so much easier! |
   |
Repeat short rows and increases. After next 4sts cast off K7 to next wrap stitch.
Complete 3rd cast off 4sts (right centre). Continue row after cast off, K4, the next 11sts have wrap at the base of each slipped stitch.
The slipped stitch and the wrap below need to be knitted as one stitch.
Left below: With point of right needle pick up the wrap at base of stitch, then knit the stitch, shown centre. Lift the wrap (brighter stitch on right needle) over knit stitch.
Below right: This has been knitted without knitting the wrap and the stitch so there are holes/elongated stitches.
Above right: You can see how, when the wrap and the stitch are knitted together, there are no holes along each section of the wedge. |
   |
| Please let me know how you go! |
It's all about colour!
Buy a kit to knit yourself or as a gift for your sister, mum or BF!
www.ozeyarn.com |
| Hope to see you soon! |
Books and Discontinued Yarns
jane@sigknit.com |
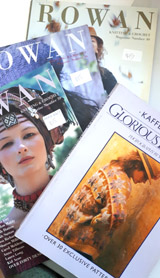   |
Below are a range of knitting books, and above a few Rowan.
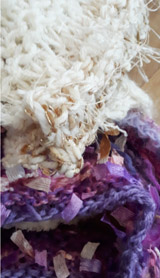
Yarns from classic wool, 4ply cotton and then "Fancy" yarn that include eyelash and tagged yarn, which I use in a few scarfs. I combine these yarns with other yarns - as they are considered a 'component' yarn - letting you create your own yarn!
If you're interested please email jane@sigknit.com asking for books and yarn |
 |
| If you'd like to discuss anything in this newsletter - or anything at all, please email Jane. Thanks for your support - Laura, Petra, Philippa, Cathryn, Helen, Margaret, Jacinta and I look forward to seeing you in the knitting circle! |
